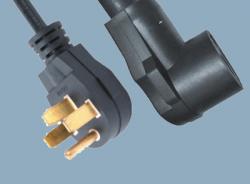
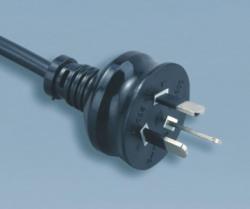
- Power Cord
- America Power Cords
- Europe Power Cords
- Australia Power Cords
- UK Power Cords
- Korean Power Cords
- Japan Power Cords
- Italy Power Cords
- South Africa Power Cords
- Swiss Power Cords
- Argentina Power Cords
- Brazil Power Cords
- Israel Power Cords
- Denmark Power Cords
- China Power Cords
- Russia Power Cords
- Singapore Power Cords
- Saudi Power Cords
- Indonesia Power Cords
- Thailand Power Cords
- IEC 60320 Power Cords
- Locking Power Cord
- Dryer Power Pord
- Industry Plug
- Extension Cord
- Rubber Insulated Sheathed Flexible Cord
- PVC Flexible Power Cable
- Power Strip
How to Replace the Power Cord
Any number of things can cause your power tool to act out of turn, or rather, in some cases, to cease acting altogether. In many instances, though, the fiend behind all this madness is simply a bad, broken, frayed, or frazzled power cord. Because a power cord is literally the bridge between power and tool, if the cord is compromised, the tool can not receive the power it requires to run. Accordingly, and obviously, bad cords must be replaced.
Fortunately, replacing a power cord is a procedure most craftsmen can manage on their own, and, as knowledge is power, allow me to bestow a bit of information that should empower you to get the power back into your tool.
The first step in all types of cord replacement is removing the damaged cord. To begin, because you will need access to the wire terminals that connect the cord to the switch, you will need to open/dismantle the tool's housing or clamshell. The switch, of course, is the tool's trigger and should be located in the handle of your power tool. NOTE: A cord will most always have as many wires as it has prongs, and the switch will always have as many terminals as your cord has wires.
Once you have removed any and all of the housing surrounding the switch and cord (which may include the handle itself), you may disconnect the cord's wires from the switch's wire terminals. BUT WAIT, before jumping straight into the deep-end, take note of the orientation and placement of the wires as they connect between terminal and cord. When installing the new cord, the wires must be connected in exactly the same way. Using tape or another marking instrument to differentiate and label the wires before disconnecting them can help prevent cross-wiring at re-installation.
If you didn't take note of the wire's orientation before removing the old cord, you should be able to find a wiring diagram in the tool's manual.
To properly disconnect the wires, you will simply need a small screw driver to loosen the terminal screws, and a few fingers to pull the wires out of the terminal. Next you simply need to remove or loosen the cord's retaining bracket and by sliding it backward, remove the cord completely. NOTE: The retaining bracket is the piece inside the handle usually right above the cord protector that clamps onto the cord. Some retaining brackets are more like a clamp but most need to be screwed-in and out.
After sliding the cord out, keep it on-hand as a reference resource for the impending installation.
In some cases the wires of your new cord will need to be stripped of insulation before it can be connected to the switch's terminals. In this case, before you strip the wires, a small piece of the cord jacket, or the flexible protective thing that surrounds the wires and essentially makes up that thing we know as "cord," will have to be cut. Looking at the old cord is usually the best reference for just exactly how much of the cord jacket to remove.
Taking care to not damage the internal wiring, cut the cord jacket long-ways, or, in the same direction the wires run. Remove a length of the jacket to expose the wires. Compare the length of the newly exposed wiring to the wires on the damaged cord. If all matches up, you're good to move on, if not, simply trim a bit more cord jacket until your wires are exposed to the same length.
Using wire strippers, strip a half-inch length of insulation from each wire. Seriously, though, use wire strippers. Other cutting tools will very likely damage the wiring which will, in turn, deplete the amount of power that enters your power tool - precisely the thing we are presently trying to fix. So, when stripping wire, use wire strippers and nothing else.
After using a small pair of pliers to carefully twist the newly exposed wires into a length-wise bundle (this will provide a better connection between the wires and terminals), you're ready to install the new power cord. Using your old cord again as a reference, carefully install the new wires in the same orientation as the former. Double check that all is well and proper before tightening the retaining bracket and reassembling the tool's housing.
After this point, you're generally done. If, however, you have access to a multimeter/multitester, or an electronic measuring device that will test the electrical current surrounding your tool, use it. Using this device ensures electrical current is traveling only into the tool's motor rather than throughout any other parts of the tool, like, for instance, a metal housing, which can, obviously, be very dangerous. Putting one end of the multimeter on the cord's plug, and the other end on the tool's handle, test for continuity. If the test registers no current, you have been successful in your repair and are prepared for greener pastures.
- Contact Us
- Simen Twon,Yuyao City,Zhejiang,China,315472
- 86-0574-62162348
- 86-0574-62160100
- [email protected]
- hoobo.show1
- Terms and Conditions
- Privacy Statement
- Need help
- Home
- About us
- Products
- Download
- News
- Equipments
- Tech-Documnets
- Contact
- Products
- Power Cord
- IEC 60320 Power Cords
- Locking Power Cord
- Dryer Power Pord
- Industry Plug
- Extension Cord
- Rubber Insulated Sheathed Flexible Cord
- PVC Flexible Power Cable
- SUBSCRIBE
- Join us and get detail information,technical parameter and new products etc.
- [email protected]
- hoobo.show1
- 86-0574-62162348
- 86-0574-62162348


